http://careers.cummins.com/us-canada/mba/strategy-mba-arturo-mijangos
I was featured on Cummins Career website for strategy
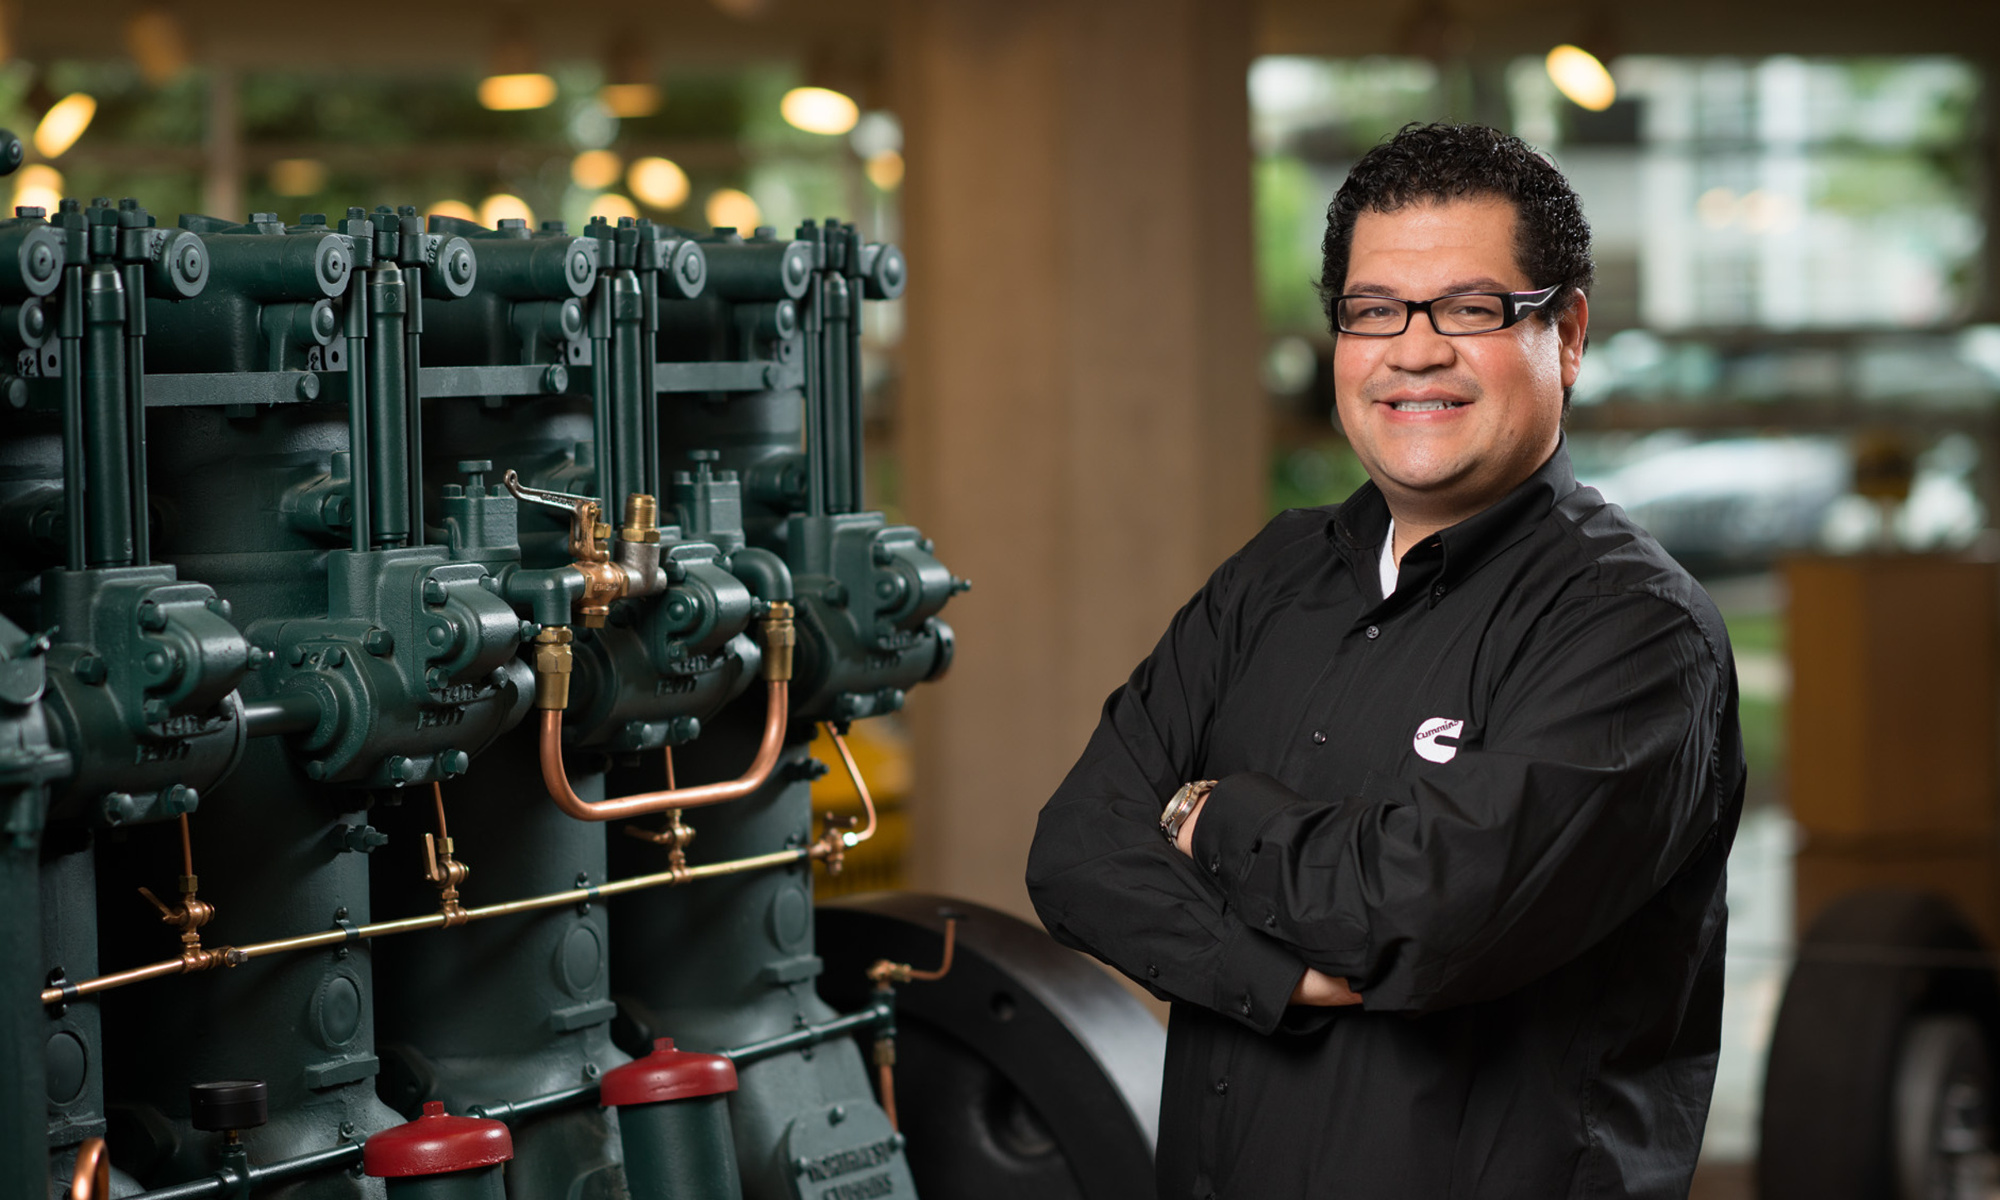
Husband, Father, Programmer, International Business Marketer

http://careers.cummins.com/us-canada/mba/strategy-mba-arturo-mijangos
I was featured on Cummins Career website for strategy
After reading this post from Gina Trapani I figured that I too need to change what I consider worthy blogging material.
Too long I’ve had ideas that I want to put out, but just burden myself with the to-do’s to get them completed. “I need better images,” “I need more references,” “Have I documented all the steps”
I this point I will stop all this non-sense and just write, hopefully I will be able to write more, more often and less scripted.
This is the new blog

A series of stories about networking using the framework from the book Up Your Game by David Bradford. Showing Up, is the networking aspect of being aware of the world around you and participating actively in it.
I arrived early to the sports bar knowing that the USA vs Germany was going to draw a large crowd. I was also excited to meet with friends for lunch, but more excited to meet someone fromCorporate Recruiting. I’m not very outgoing, but networking is important to me. I see it as finding opportunities to serve rather than being social. The server took me to my table —not the best spot—and I waited for the rest of the party. “Are you Arturo?” a friendly face asked, I must have nodded, because the next line was: “Hi, I’m Elisabeth.”
I remember now reading in Keith Ferrazzi’s book “Never Eat Alone” about Connectors, people that are well connected. I kept thinking: “When will I ever find someone like that.” Well now I know Elisabeth. Lunch was great, the game awful. I kept finding myself amazed of how many people Elisabeth would greet in the tables close by and people walking next to us. Was she that elusive Connector, she asked me a few things: my work, my hobbies, my family. I can now picture her mental rolodex spining trying to find a connection, where to *click*. After I told her about my young daughter she said: “I have a friend, who also has a young family, I think you should meet him.” *CLICK*
We finished lunch, I offered to connect back with her. I got to my desk, I had an email from Elisabeth addressed to me and her friend, making the connection. Wow, this is a connector that knows how to follow up. *Double Click* I didn’t do anything, I only showed up.

I’ve been reading this week the book “Up Your Game” by . One the the principles he talks about is Start Up.
I wanted to share a story about this principle…
So the story goes back 2 years ago when I was an Intern and my friend Liva R. was also interning. Liva had a co-worker Chizuki W., also an intern; Liva had asked me for some help with an excel project. I took some time off my day, and we completed the project. When Chizuki was having some questions about an excel problem she was having, Liva mentioned my name.
I spent probably 1-2 hours helping Chizuki build her excel workbook, and she was very greatful. She invited me to go to lunch with her and her boyfriend. Her boyfriend, Richard also works here in the company. For the lunch, Richard came with his co-worker, Joby. We had a good time.
2 years later Richard and Joby were looking for an employee to highlight in their series “A Day in the Life” for the company recruiting page. For some reason, they think of me, Joby sends a message to Chizuki and they contact me. They do a video, a photo session and a web post. (Still not public, will update when it is available) All because I decided to help a friend with a project.

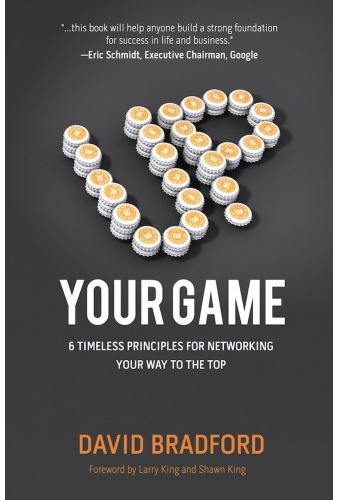 Up Your Game: 6 Timeless Principles for Networking Your Way to the Top


This was an easy and fun read. The 6 principles outlined in the book are:
What the booked showed me, was that there is no magic to networking, it is simply to be aware of our relationships and KNOW that they matter.
This means to “give with no thought of getting.” I am amazed how many time we need to be reminded of the golden rule, “Do unto others.” I guess that when people have been cheated on, trampled by loved ones, or otherwise abused it is hard to believe that we have to give freely and others will reciprocate. I do believe that people will reciprocate, and I am amazed by the love that I have received through out my life.
This principle is to be present, and in this world of so many options it is hard to be in the NOW. I have been guilty of being at home, yet having my head buried on my phone, or my computer. I have also seen the benefits of showing up, being at the right place.
Return calls, connect back, make something out of an encounter. There are people who are masters of this art, I am not one of them. I have to program myself to do a follow-up, but I know tha it is valuable.
Go deeper than just “friend” someone, or “connect” with someone, or “follow” someone. This is the real process of caring for your network. This is easy for me, I am curious, and genuinely care for people. My problem is that when I am comfortable in a group, I don’t try to grow it or meet others. I forget that I need to be more inclusive and continue to find points of interest with other people.
This is about moral fortitude, doing what is right. This will be something that we all need to constantly think about; and strive to be righteous.
Never stop working on your network, this is your footing for anything that could happened in your career or in life. You must push forward.
I’m having trouble coming up with good topics each week, or at least each week, so I’ll do a post-mortem on Mondays.
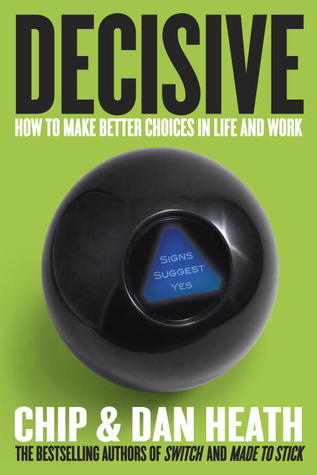 Decisive: How to Make Better Choices in Life and Work
In my new role in the Technology Strategy and Innovation office we get to think about, how to decide which ideas should receive R&D dollars. This books really helped me understand a few things that we would want to implement.
All companies want to be innovative, they want to know the future and be ready for it. One of the quotes in the book really got me thinking
… most corporate executives favor prediction; their belief seems to be, “To the extent that we can predict the future, we can control it.” In contrast, though, entrepreneurs favor active testing: “To the extent that we can control the future, we do not need to predict it.”
If we could carve a space where the tech leaders are not looking for THE future, but shaping it.
Products, patents, improvements all begin with ideas. I’ve seen about 15 software vendors of ideation software like this, this, and this. They all have some concept of a challenge that should spark ideas, à la “How can we make X product better.” Crafting that challenge is not easy, which challenges are better and would generate better ideas.
The book covers the concept of “perspective hindsight,” the idea of thinking of the future as if has already transpired. Say you are planning a company picnic and you want to make sure that everything went well, in spite of possible problems. Think of these 2 questions, which one gets you thinking more:
Russo and Schoemaker have found that when people adopt the second style of thinking—using “prospective hindsight” to work backward from a certain future—they are better at generating explanations for why the event might happen.
They call the overall process: WRAP
Although their process seems interesting, I don’t think I will be using the whole process, but I will adopt certain heuristics to the way I think. I will also implement certain concepts in the way we implement our innovation process at the company.

I love to write about my experiences, show how to do the things that I’ve learned. To give freely of my knowledge, even if only 1 person actually reads this blog.
I’ve been working on catching up on the summer of 2012, I did an internship that summer and although we had a lot of pictures, we didn’t post them anywhere. I started the family blog over a year ago, and I never intended to do retro posts, I felt that we should document that time.
I wanted to find ways to document our vacations on a blog post. There is a lot of thing on family vacations, but there were no tips how to write a post about your vaction, how to convert hundreds of images into a good post. So this is my atempt at that.
 Yes, cliché, but so very true. Gather all the images into one place: all your DSLR images, the ones you took with your phone, ask relatives if they have images, videos, etc. Put everything in one place and look at them once over. What is the feeling you want to transmit on that post. I write one word themes: excitement, fun, sun, bright, awe, etc. That is the feeling that will guide you throughout the post. Your goal will be to have your readers feel that.
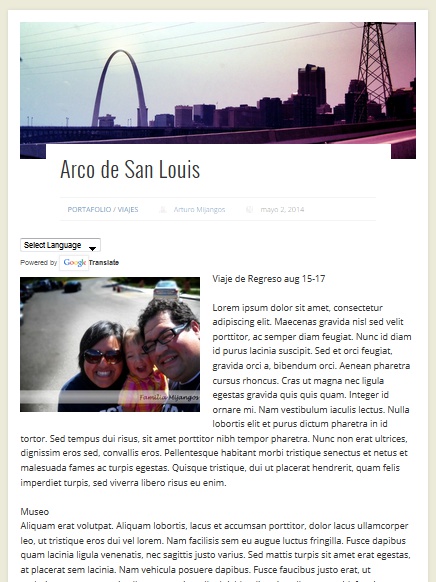
I will use this post on our trip to Saint Louis as an example. I chose to have my readers feel small, because that is how we felt when were were at the monument.
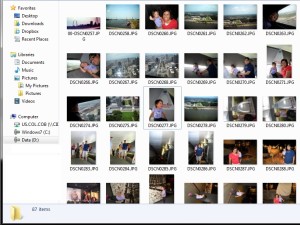
This is always the harderst thing for me, for this trip to the Saint Louis Arch I had over 200 images. How was I ever to going to reduce that number to a handful of images to use. I normally make a copy of my images and I start deleting, I do multiple passes, this is sort of the way I do it:

I’m able to remove around 50% of the images using the previous 3 steps. There will always be images that you fall in love with, so make sure you keep those. There will be a time when you will have to make a decision, but right now just reduce your images to a manageble set.
By this point I get sick of just looking at pictures and videos. Most of the time I feel overwhelmed and think that I will never be able to write a post that is not 2000 words long that not even my family would want to read. So I leave that behind and start thinking of the flow.
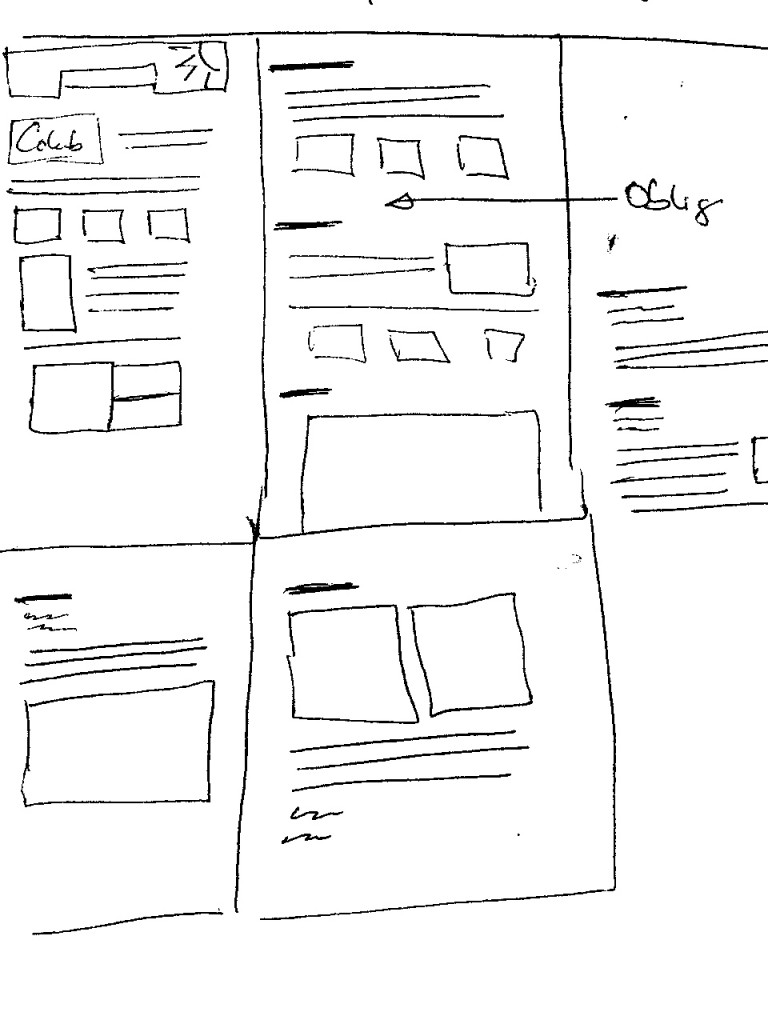 I use blank paper and I start drawing headings and boxes. I first think about what I want to write about, which experiences make sense. What emotions did I feel during the trip and how will they all fit together. I think of my audience, mostly my family, if we were gathered together what do I want to tell them. One thing I always tell myself is: “You are not making a documentary on the place.” I don’t want to be just showing images of building and exhibits, I want to document my family, and the emotions we’ve felt in those places. Yes there will be images of buildings, but they should make us remember those feelings.
Depending on the length of the post I will write 3-4 headings. For the Arch post I settled on 4 headings: the museum, the math behind the arch, being at the top, and our return trip. On my piece of paper I put down the heading, and put some boxes with images that I thougth would be good. I wanted to put 2 images side by side, on for the east side of the monument and another for the west side. I wanted an image of the “elevators.” I also think of what I call, obligatory picture, you know the one that shows the name of the place with your whole family in from. Yes, the Disney Land Mickey Mouse garden in the entrance of the park. So in a few places I just write, oblig, to make me look for an image that would be that, THE images for that section.
I also represent with smaller squares images that I think will be good to give context or to tell part of the story, but if people skip them I’m fine. WordPress uses galleries, and I use galleries in different ways on my posts, but those smaller boxes are the galleries. I use 3 column galleries to most of the time I think of how many images I want to add to a certain sections in increments of 3 (3, 6,9, etc).
Having a good grasp of what I need to do, I go back to the images and it becomes a lot easier to find the images I want to use. There are times when I know I need 5 images and I still have 30, I create a new folder, put the 30 images inside and start deleting more images. Sometimes I have to do the oposite, I have to look at all the images and think of 3 that I HAVE to keep, so I move those to the new folder, that eases the process.
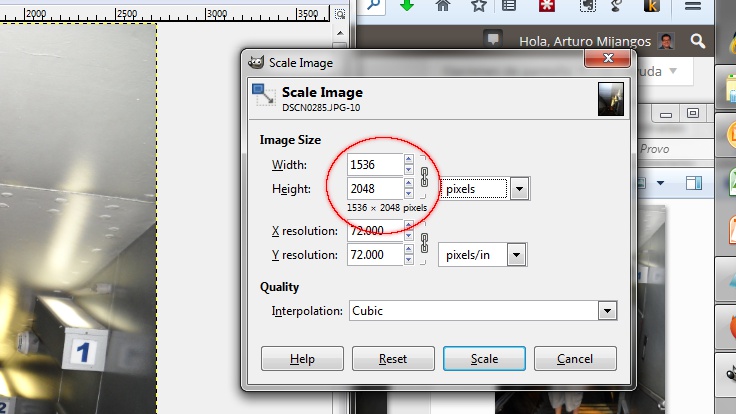 Many, many times I know I will need 5 and I end up with 10 in the set, and I’m fine. I start editing process, I use GIMP for the post processing. I’ve found that at this point there are images that I thougth that were amazing, and then looking at them in a post production state, they aren’t really that good. Or I thougth I could straighten them, but then they don’t work out. So it is good to keep a few extras on hand. I reduce the resolution to about 2048px x 1536px; it is still HD, but not too big. WordPress creates lower resolution copies for various applications, so that makes it even easier.
 At this point is where I start putting my blog post together. Begin by getting some sample text to help me see what it’s going to look like. I use lipsum.com to get dummy text, it helps me picture inside the post what the final product will look.
I then start adding the images to the sample text, I use my paper flow to guide what I’m putting where. Not 100% strict, some images looke better in one way rather than another.
You are done with images.
Once I know how the post is going to look like, and I see the images and I start remembering the events, all the emotions come back. I then convey those emotions and memories in the text. Some explanations takes long paragraphs, some take a caption on an image.
I picture my family (my audience) waiting for me to tell them about our vacation. I think of my daughter going back in time and reading about the time she walked, or rode a bike. I want her to see those images, but also remember those stories. I write to her, I write to make those memories last longer.
This is not how I would write a post like this one, but this is how I write a post about our family.
This is the result, from a bird’s eye view:

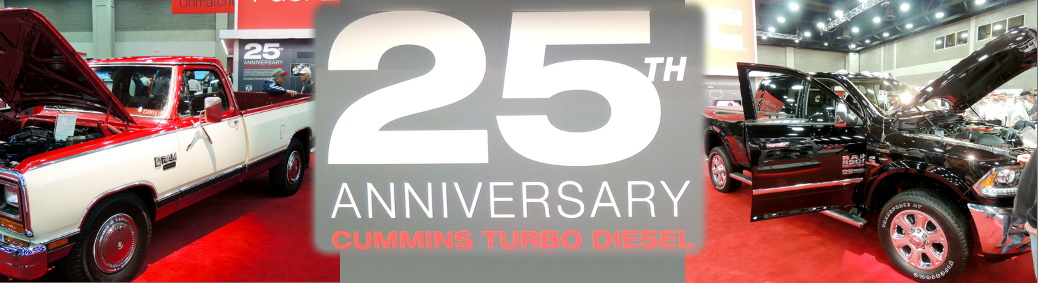
Can you believe that it has been 25 years since Cummins joined forces with Chrysler on the Ram brand.
I recently attended MATS in Louiseville, KY and saw the history of the Cummins – Ram co-branding, but also many other co-branding partnerships.

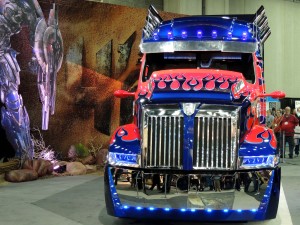
This is a Western Star truck using the Transformers brand to drive traffic to their booth.


This is a Freightliner truck with a Cummins Natural Gas engine. This truck uses CNG, notice the big CNG tanks in the back. Each one of those cilinders cost about $40,000. Again an example of a co-branding, using the expertise of Cummins for the engine, and the Freightliner brand for the truck.
For my family blog, I decided to fully convert it to Spanish. We had been primarily posting in Spanish, but most of the descriptions were in English. The primary reason for doing the blog in Spanish was so that we could have a connection with our family in Guatemala, and although many do speak English, Spanish is still the best way to communicate with them. Although I did not do all these changes in the order that I present them here, now that I have given more thought to the process I think this is the best way to do it.
From the WordPress help:
Although WordPress displays in U.S. English (en_US) by default, the software has the built-in capability to be used in any language. The WordPress community has already translated WordPress into many languages, and there are themes, translation files and support available in many other languages. It is also possible to create a multilingual blog with the help of Plugins.
It is fairly simple to change the language for the installation of your WordPress instance. You can find a list of languages in the codex site, the list will live here soon. For now, go here. Since I wanted the Spanish translation, I started at es.wordpress.com, but the instructions are always the same:
/wp-content directory called /languagesdefine ('WPLANG', '');
define ('WPLANG', 'es_ES');
Now that your installation is in the language that you desire, you can change the language on your theme, this is can be as easy as your main installation or downright impossible; this because you depend on the theme’s creator to allow internationalization. I believe that the all default themes come ready for multiple languages, for others it really is hit or miss. I had chosen Pinboard because it offered internationalization.
You can find a lot of information in the wiki entry, but in short for a theme to offer internationalization, or as commonly written i18n (where 18 stands for the number of letters between the first i and last n in internationalization), they need to provide a template.
Pinboard provides a template file called pinboard.pot, which contains a list of all the translatable strings extracted from the sources. The .pot files looks something like this:
 #. TRANSLATORS: Please leave %s as it is
 #. Thank you for contributing to this project.
 #: src/name.c:36
 msgid "My name is %s.\n"
 msgstr ""
Translating the theme
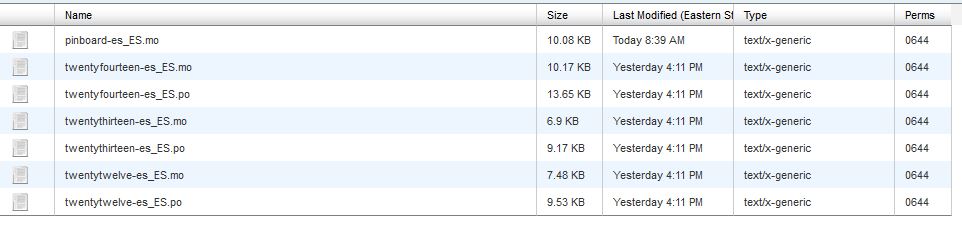
Search for other people that have translated the theme, you should be looking for a file name like themename-locale.mo or themename-locale.po (ie pinboard-es_ES.mo). I couldn’t fin any translations on the support forums or on searches, I had to do it by myself.
In short you need to rename the .pot file into a .po file and add all the translations on the messages. You can find all about it here, but there are easier ways.
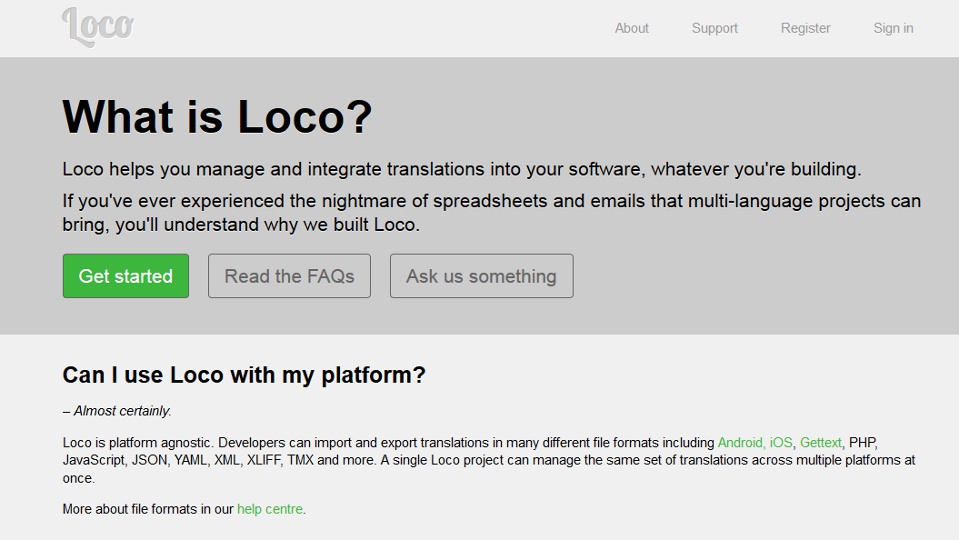 I used the web service Loco, which offers a very easy interface to load the
 .pot file, translate each message and then download the .mo file. From their about page: “Loco helps you manage and integrate translations into your software, whatever you’re building.”
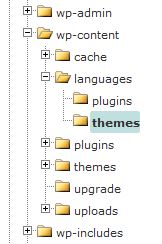
I renamed the file as pinboard-es_ES.mo and then uploaded it to the correct folder. This is in a subfolder where you placed the wordpress language file.
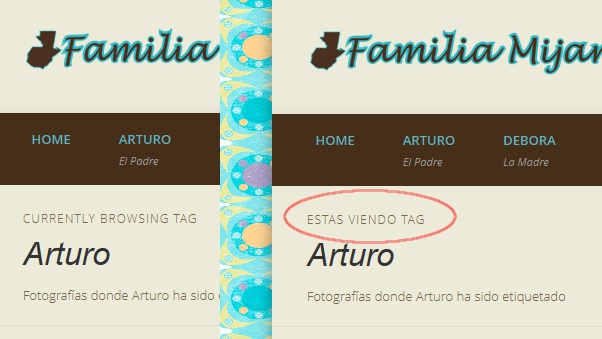
By this point you should be able to see your site in the language of your choosing. I love looking now at my blog and just seeing that I made it happen.
There are several ways to do this, you can learn about them here. I considered these 3:
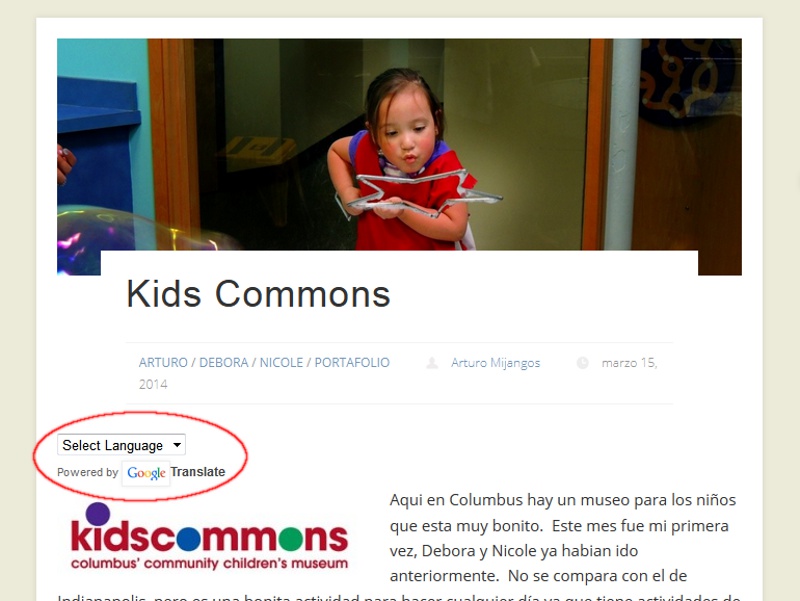
Although I would have full control over the content on options 1 and 2; the burden was so big that I couldn’t do it. I tried a few services and settled on Google’s Translation services. Here are the steps I used to add this service to my blog.
Go to translate.google.com
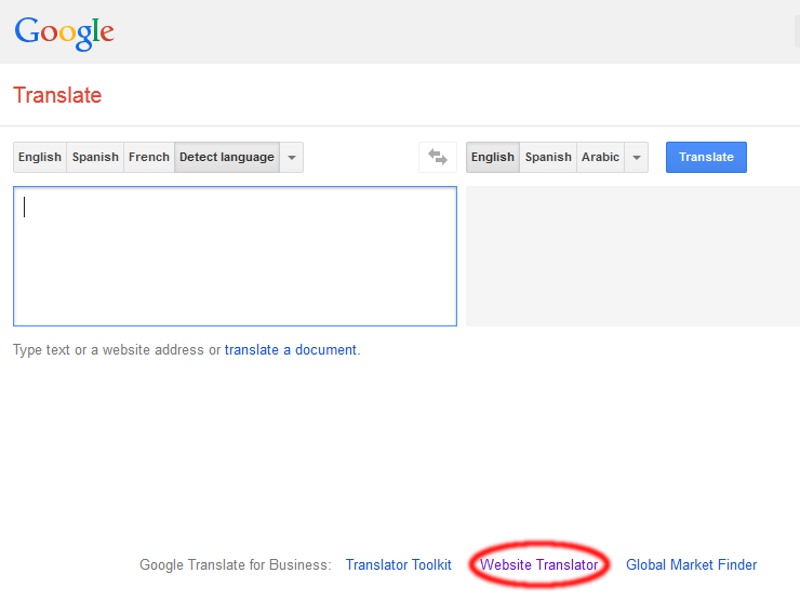 Select Website Translator
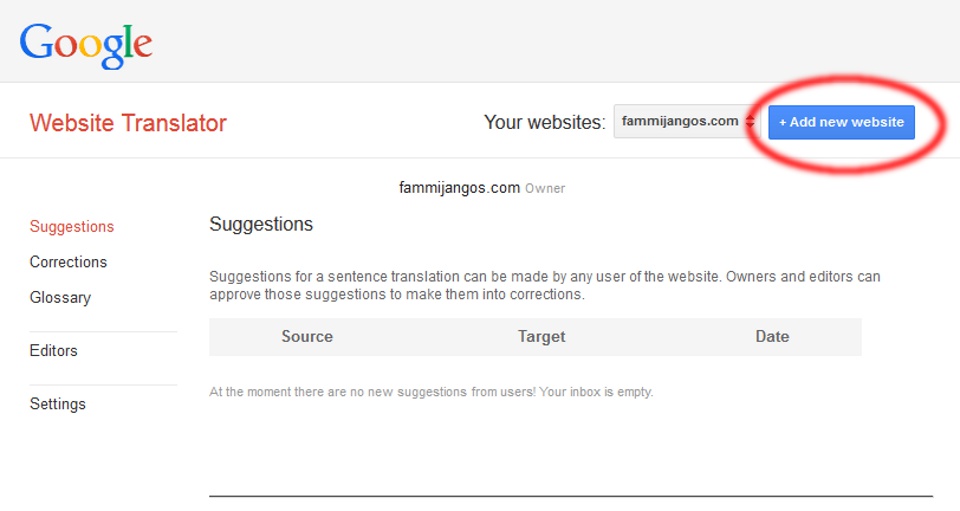 Then click on “Add new website”
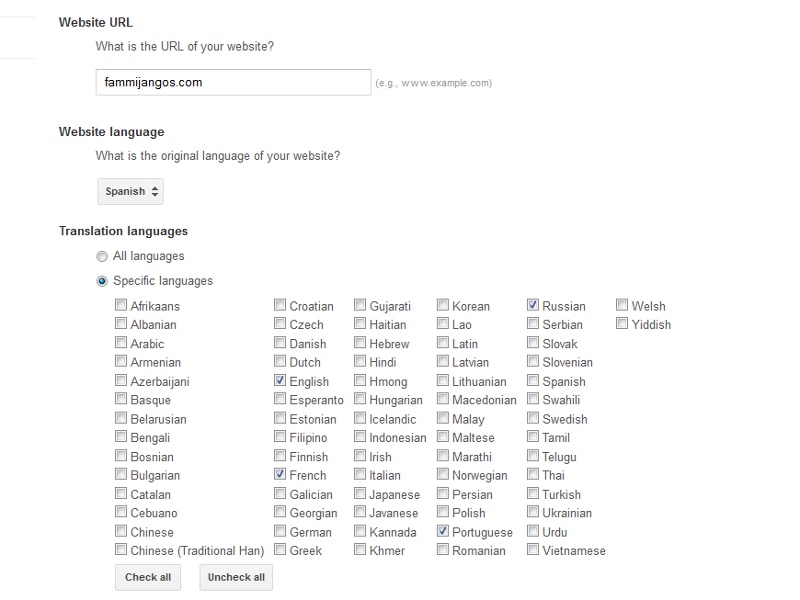 Add your site, the original language and the languages you want to have available
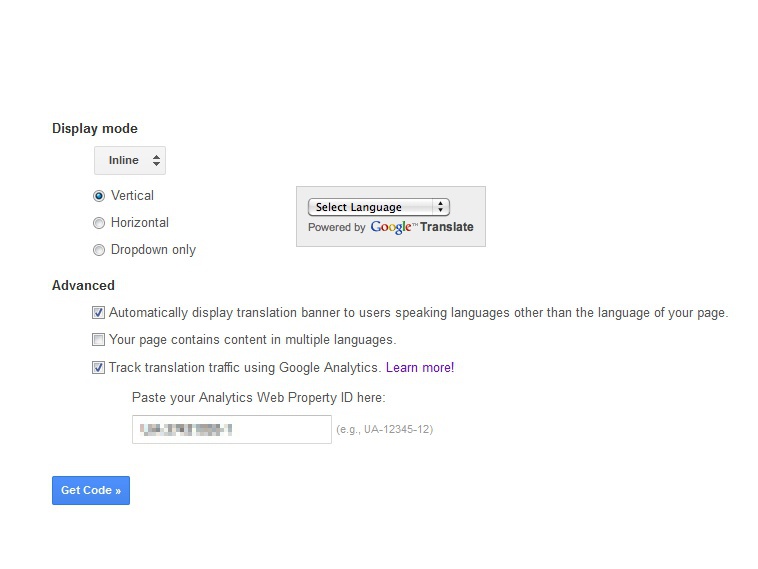 Pick the way that you want your dropdown bar to look and see if any of the Advance features apply. I use Google Analytics so I wanted to track this. If none of them make sense to you, leave them unchecked. Now click on “Get Code”
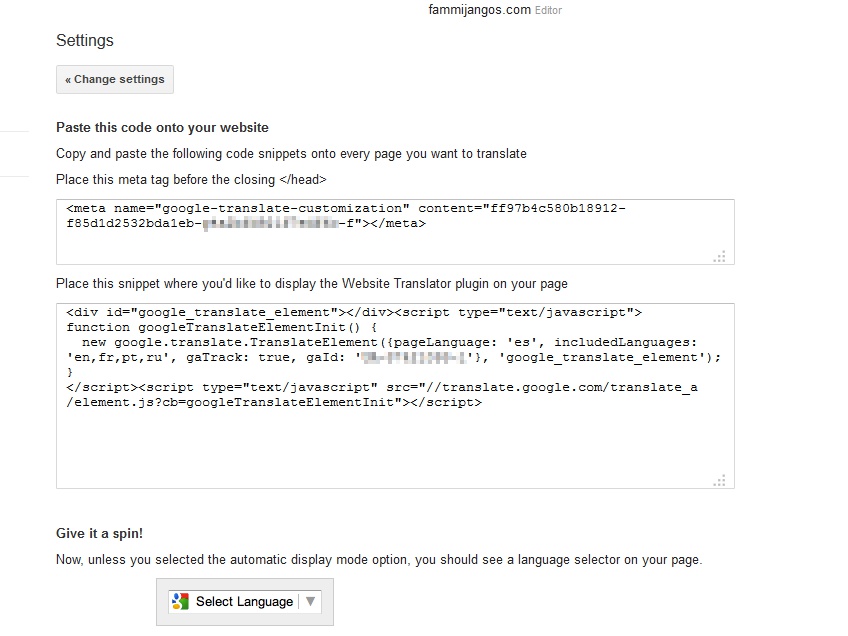 This code needs to be inserted in two places for it to work on your wordpress site. This is where it becomes less easy, if you see the instructions as being too complicated you can try this plugin “Google Language Translator” it looks simple to use and has very good ratings
First you will need to find your theme’s functions.php and edit it. You can find it in the Appearance editor. Then add the following code:
if ( ! function_exists('mijangos_google_translate')):
/***
Adds Meta tag to header
*/
function mijangos_google_translate() {
echo '<meta name="google-translate-customization" content="XXXXXXXX-XXXXXXX-g4a2bfd921f7edf6c-f"></meta>'."\n";
}

add_action('wp_head', 'mijangos_google_translate');

endif;
Notice that the part after echo ' is from the code being generated, and don’t forget to end it with ' ;. This functions puts this code in the header. Now click on “Save File.”
Edit the single.php page, this is the page that generates your posts. I wanted the language selector to be just above the post content. I located that part and put the following code in.
<!-- Google Translate -->
<script type="text/javascript">
function googleTranslateElementInit() {
new google.translate.TranslateElement({pageLanguage: 'es', includedLanguages: 'en,fr,pt,ru', gaTrack: true, gaId: 'UA-37421093-1'}, 'google_translate_element');
}
</script><script type="text/javascript" src="//translate.google.com/translate_a/element.js?cb=googleTranslateElementInit"></script>
<!-- Google Translate -->

<div style="margin: auto;">
<div id="google_translate_element"></div>
Save the file and go to a post. This was my result.