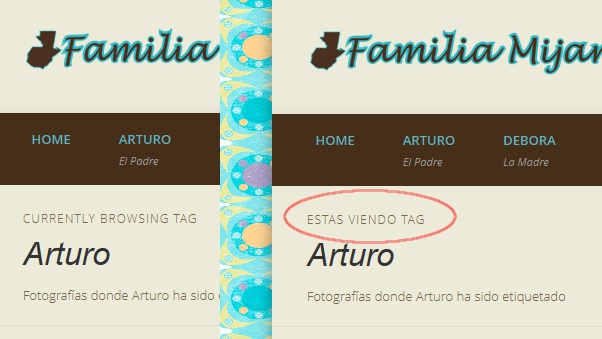
For my family blog, I decided to fully convert it to Spanish. We had been primarily posting in Spanish, but most of the descriptions were in English. The primary reason for doing the blog in Spanish was so that we could have a connection with our family in Guatemala, and although many do speak English, Spanish is still the best way to communicate with them. Although I did not do all these changes in the order that I present them here, now that I have given more thought to the process I think this is the best way to do it.
WordPress in Your Language
From the WordPress help:
Although WordPress displays in U.S. English (en_US) by default, the software has the built-in capability to be used in any language. The WordPress community has already translated WordPress into many languages, and there are themes, translation files and support available in many other languages. It is also possible to create a multilingual blog with the help of Plugins.
It is fairly simple to change the language for the installation of your WordPress instance. You can find a list of languages in the codex site, the list will live here soon. For now, go here. Since I wanted the Spanish translation, I started at es.wordpress.com, but the instructions are always the same:
- Download the .mo language file for your language.
- On your site server, create a new folder in your
/wp-contentdirectory called/languages - Upload the .mo file to the languages folder you just created.
- Open your wp-config.php file in a text editor and search for:
define ('WPLANG', '');
- Edit this line according to the .mo file you’ve just downloaded, e.g. I wanted the Spanish language so I added:
define ('WPLANG', 'es_ES');
- Once you’ve added your language code, save the file.
- Upload the modified wp-config.php file into the WordPress root directory.
- Open your browser and go to your WordPress site. It should now display in the newly-installed language.
A Theme with Internationalization
Now that your installation is in the language that you desire, you can change the language on your theme, this is can be as easy as your main installation or downright impossible; this because you depend on the theme’s creator to allow internationalization. I believe that the all default themes come ready for multiple languages, for others it really is hit or miss. I had chosen Pinboard because it offered internationalization.
What does it mean to offer internationalization
You can find a lot of information in the wiki entry, but in short for a theme to offer internationalization, or as commonly written i18n (where 18 stands for the number of letters between the first i and last n in internationalization), they need to provide a template.
Pinboard provides a template file called pinboard.pot, which contains a list of all the translatable strings extracted from the sources. The .pot files looks something like this:
 #. TRANSLATORS: Please leave %s as it is
 #. Thank you for contributing to this project.
 #: src/name.c:36
 msgid "My name is %s.\n"
 msgstr ""
Translating the theme
Search for other people that have translated the theme, you should be looking for a file name like themename-locale.mo or themename-locale.po (ie pinboard-es_ES.mo). I couldn’t fin any translations on the support forums or on searches, I had to do it by myself.
In short you need to rename the .pot file into a .po file and add all the translations on the messages. You can find all about it here, but there are easier ways.
 I used the web service Loco, which offers a very easy interface to load the
 .pot file, translate each message and then download the .mo file. From their about page: “Loco helps you manage and integrate translations into your software, whatever you’re building.”
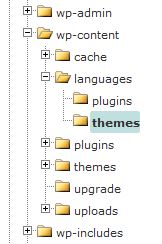
I renamed the file as pinboard-es_ES.mo and then uploaded it to the correct folder. This is in a subfolder where you placed the wordpress language file.

By this point you should be able to see your site in the language of your choosing. I love looking now at my blog and just seeing that I made it happen.
Changing the Language in Your Posts
There are several ways to do this, you can learn about them here. I considered these 3:
- Translate each post
- Create separate posts for different audiences
- Use a service to translate
Although I would have full control over the content on options 1 and 2; the burden was so big that I couldn’t do it. I tried a few services and settled on Google’s Translation services. Here are the steps I used to add this service to my blog.
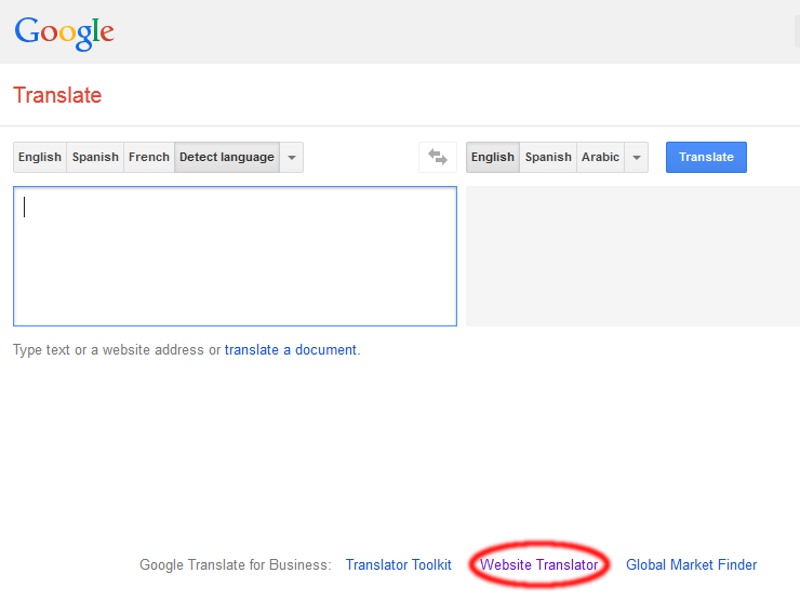
Go to translate.google.com
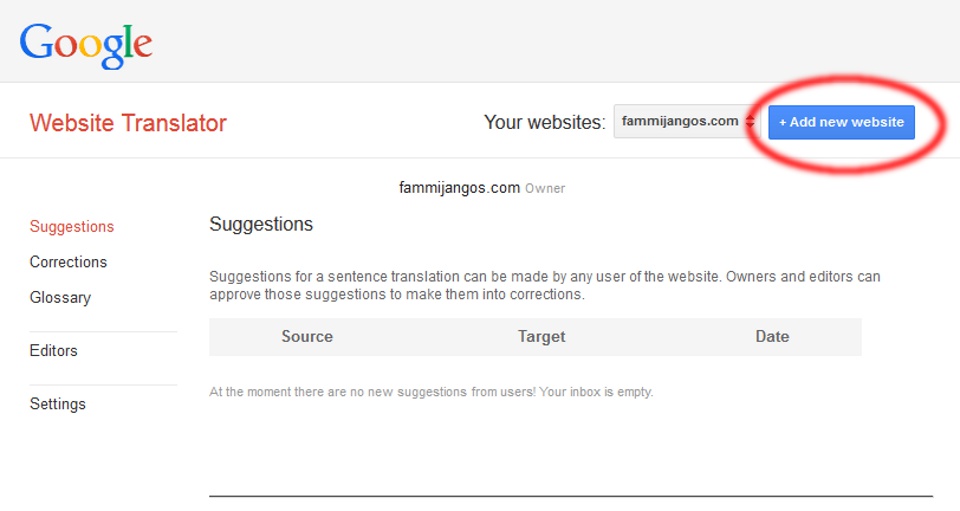 Then click on “Add new website”
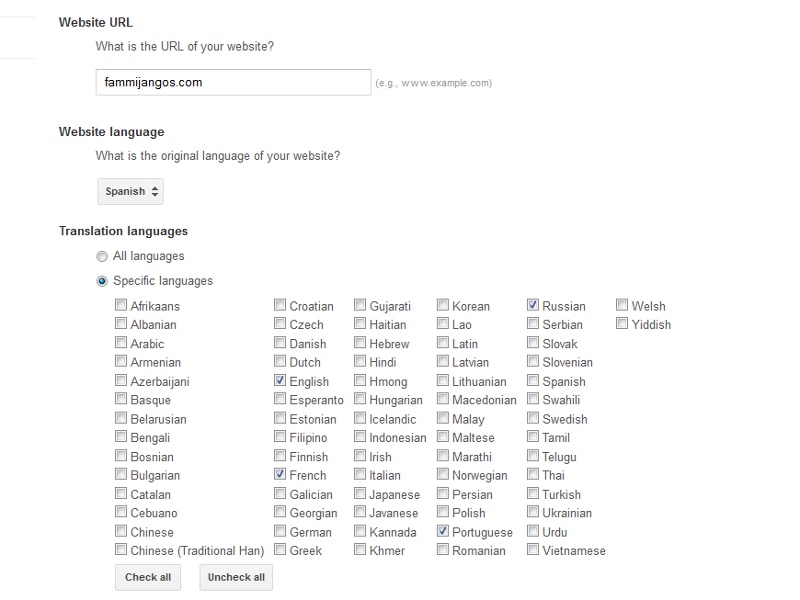 Add your site, the original language and the languages you want to have available
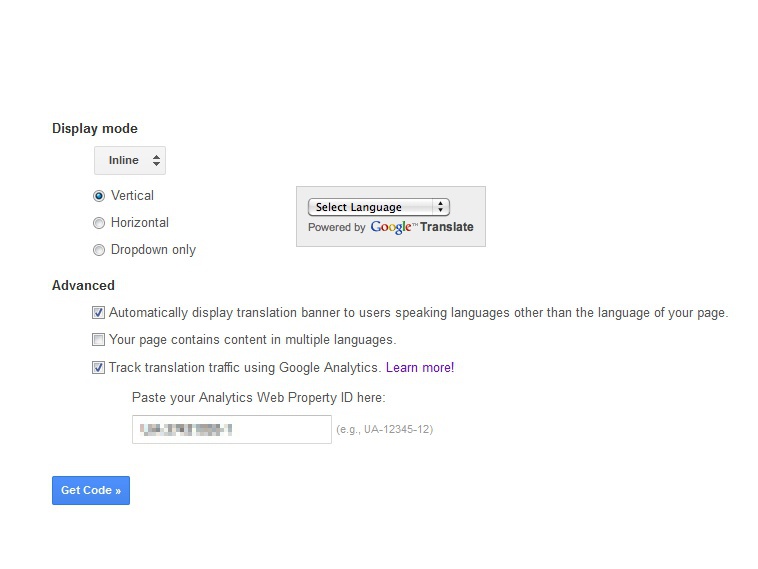 Pick the way that you want your dropdown bar to look and see if any of the Advance features apply. I use Google Analytics so I wanted to track this. If none of them make sense to you, leave them unchecked. Now click on “Get Code”
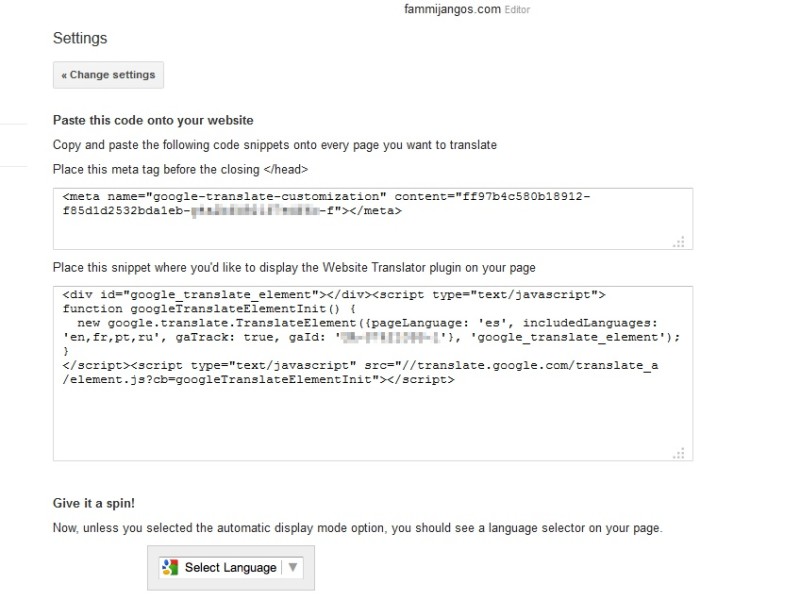 This code needs to be inserted in two places for it to work on your wordpress site. This is where it becomes less easy, if you see the instructions as being too complicated you can try this plugin “Google Language Translator” it looks simple to use and has very good ratings
First you will need to find your theme’s functions.php and edit it. You can find it in the Appearance editor. Then add the following code:
if ( ! function_exists('mijangos_google_translate')):
/***
Adds Meta tag to header
*/
function mijangos_google_translate() {
echo '<meta name="google-translate-customization" content="XXXXXXXX-XXXXXXX-g4a2bfd921f7edf6c-f"></meta>'."\n";
}

add_action('wp_head', 'mijangos_google_translate');

endif;
Notice that the part after echo ' is from the code being generated, and don’t forget to end it with ' ;. This functions puts this code in the header. Now click on “Save File.”
Edit the single.php page, this is the page that generates your posts. I wanted the language selector to be just above the post content. I located that part and put the following code in.
<!-- Google Translate -->
<script type="text/javascript">
function googleTranslateElementInit() {
new google.translate.TranslateElement({pageLanguage: 'es', includedLanguages: 'en,fr,pt,ru', gaTrack: true, gaId: 'UA-37421093-1'}, 'google_translate_element');
}
</script><script type="text/javascript" src="//translate.google.com/translate_a/element.js?cb=googleTranslateElementInit"></script>
<!-- Google Translate -->

<div style="margin: auto;">
<div id="google_translate_element"></div>
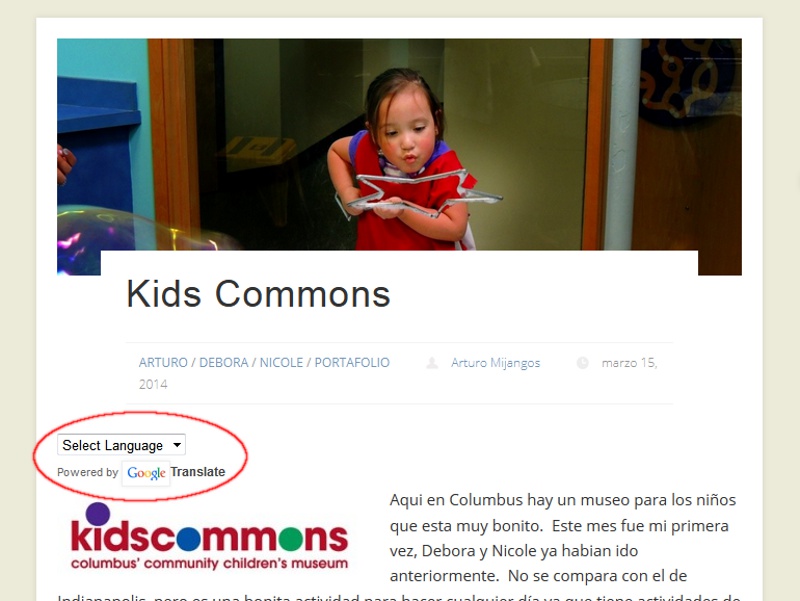
Save the file and go to a post. This was my result.


